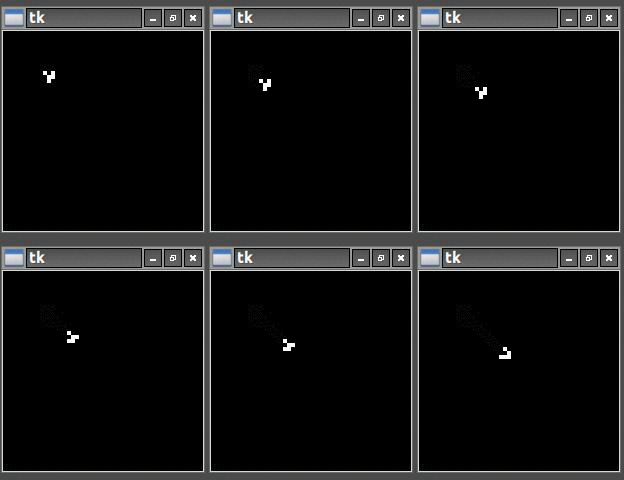
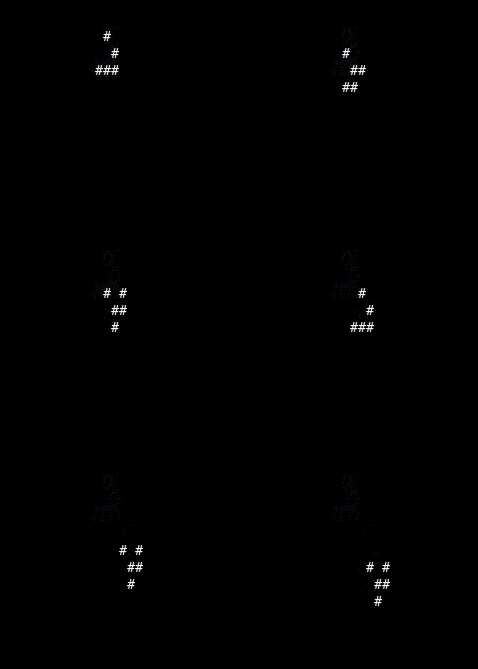
While the Game of Life ASCII display I talked about here is functional it’s limited and can’t show grids larger than a few dozen cells on a side. Fortunately Python has a standard module called Tkinter that allows for much better graphical displays. Using it requires a number of changes to the existing code but you get much nicer output. Compare the output of the graphical display with the old ASCII version.
With the ASCII display I was able to implement it as a function that could be called as needed. Tkinter comes with it’s own event loop that handles updating the window and different events that might happen during operation. Tkinter windows have the ‘after’ method to schedule a function that is called after a certain number of milliseconds. The code that updates the state of the cells goes into this function.
For example:
#Module import
import Tkinter as tk

# Update function
def update(currentState):
    #this is where your code goes that does
    #whatever it is you want to do every
    #x milliseconds...100 for example
    currentState = newState
    #reset the after method to call update again in 100 ms
    root.after((100), update, currentState)

#Initialize
fps = 10 #number of times to update each second
# Create the root window
root = tk.Tk()
#variable to hold image
tkimg = [None]
tkimg[0] = state
#create label with image
label = tk.Label(root, image=tkimg[0])
label.pack(side="right")

#Run
root.after((1000/fps), gol_update, currentState)
root.mainloop() # main event handler
The images that are displayed are in PGM format. This format is very easy to use and allows for a simple transfer from array data to image data for display.
The functions to do so are defined in pgm_write.py. Currently I’m actually writing to a file which is then opened and displayed. This is not an efficient way to do this so I’ll change it soon to just store the image in a variable…but for now that’s the way it is.
# vim: tabstop=8 expandtab shiftwidth=4 softtabstop=4
'''
Chad Bonner Dec.19.2013
Game of Life PGM Image Write Function
pgm_write.py
'''
def write_file(image):
    #set up number of rows and colums variables from array size
    width = len(image[0])
    height = len(image)
    # define PGM Header
    pgmHeader = 'P5' + '\n' + str(width) + '  ' + str(height) + '  ' + str(1) + '\n'
    # open file for writing
    filename = 'state.pgm'

    try:
        fout=open(filename, 'wb')
    except IOError, er:
        print "Cannot open file"
        sys.exit()

    # write the header to the file
    fout.write(pgmHeader)

    # write the data to the file
    for row in image:
        for cell in row:
            #create byte for value of each cell
            pixel = chr(cell)
            fout.write(pixel)
    # close the file
    fout.close()
To keep things from getting too unwieldy I took the functions used for the game of life mechanics and separated them into a different file gol_defs.py:
# vim: tabstop=8 expandtab shiftwidth=4 softtabstop=4
'''
Chad Bonner Dec.19.2013
Game of Life Function Definitions
gol_defs.py
'''
#Module import
import copy
import sys
import time
import random

# Function Definitions

def updateState(currentState, neighbors):
    '''
    this function is where the actual game of life calculations happen
    for each cell
        count = 0
        for each neighbor
            if currentState == alive
                count = ++
        if count == 3
            nextState = alive
        else if count != 2 or 3
            nextState = dead
    '''
    nextState = copy.deepcopy(currentState)
    Rindex = 0
    for row in currentState:
        Cindex = 0
        for cell in row:
            count = 0
            for neighbor in neighbors:
                # % does modulo indexing to create toroidal universe
                neighborR = (Rindex + neighbor[1]) % len(currentState)
                neighborC = (Cindex + neighbor[0]) % len(currentState[0])
                if currentState[neighborR][neighborC] == 1:
                    count += 1
            if count == 3:
                nextState[Rindex][Cindex] = 1
            elif count != (2 or 3):
                nextState[Rindex][Cindex] = 0
            Cindex += 1
        Rindex += 1
    return nextState

def display(universe):
#very simple routine to display animated cell state in terminal
    sys.stderr.write("\x1b[2J\x1b[H")   #clear screen and reposition cursor
    for row in universe:
        for column in row:
            if column == 0:
                sys.stdout.write(' ') #leave empty for 0
            else:
                sys.stdout.write('#') #fill in for 1
        print "\r"
    sys.stdout.flush()

def populate(numR, numC, use_seed, insertR, insertC, seed):
    #populate either with a seed or with random 1s and 0s
    if use_seed == 0:
        #Populate with random field of 1s and 0s
        currentState = [[random.randint(0,1) for i in range(numC)] for j in range(numR)]
    else:
        #Populate with seed
        currentState = [[0 for i in range(numC)] for j in range(numR)]
        nextState = [[0 for i in range(numC)] for j in range(numR)]
        Cseed = len(seed[0])
        Rseed = len(seed)
        for i in range(Rseed):
            for j in range(Cseed):
                currentState[insertR+i][insertC+j] = seed[i][j]
    return currentState
This lets me concentrate on just the higher level display and control functions in the main module:
# vim: tabstop=8 expandtab shiftwidth=4 softtabstop=4
'''
Chad Bonner Dec.21.2013
Game of Life
gol.py
'''
#Module import
import Tkinter as tk
import sys
import time
import gol_defs
import pgm_write
import datetime

#GOL Update Loop
def gol_update(currentState):
    #update state with gol modulei
    currentState = gol_defs.updateState(currentState, neighbors)
    #select display type
    if display == 3:
       #Display option 3 - graphical display
        pgm_write.write_file(currentState)
        #open state image
        state = tk.PhotoImage(file="state.pgm")
        #set image size
        width = dis_width/state.width()
        height = dis_height/state.height()
        state = state.zoom(width, height)
        tkimg[0] = state
        #update label with image
        label.configure(image = tkimg[0])
        root.after((1000/fps), gol_update, currentState)
    return currentState

#Declarations
run = True
rows = 250           #num rows of matrix
columns = 250        #num columns of matrix
fps = 10            #number of frames per second to display
sleepTime = 1.0/fps #calculate time to sleep between updates
use_seed = 0        #0=don't use seed, 1=use seed
display = 0         #0=no display, 1=info display, 2=ascii graphics, 3=tkinter
dis_width = 500      #display width and height
dis_height = 500
#define locations of 8 neighbor cells
neighbors = [[-1,-1],[0,-1],[1,-1],[-1,0],[1,0],[-1,1],[0,1],[1,1]]

seed = [[0,0,1],   #glider
        [1,0,1],
        [0,1,1]]

#Initialize
currentState = gol_defs.populate(rows, columns, use_seed, 3, 3, seed)
root = tk.Tk()

#Initialize display according to display type selected
if display == 3:
    tkimg = [None] #used to keep image from being garbage collected
    pgm_write.write_file(currentState)
    state = tk.PhotoImage(file="state.pgm") #open state image
    #set image size
    width = dis_width/state.width()
    height = dis_height/state.height()
    state = state.zoom(width, height)
    tkimg[0] = state
    #create label with image
    label = tk.Label(root, image=tkimg[0])
    label.pack(side="right")
    #Run
    root.after((1000/fps), gol_update, currentState)
    root.mainloop()
else:
    while run == True:
        if display == 2:
            #display ASCII graphics
            gol_defs.display(currentState)
            currentState = gol_update(currentState)
            time.sleep(sleepTime)
        elif display == 1:
            #display info only
            print "working..."
            currentState = gol_update(currentState)
        else:
            #no display
            currentState = gol_update(currentState)
This is basically the same structure as in the cut down example above. What I’ve done here though is enable choosing the type of display to use. I want to choose between a graphical display, ASCII display, just printing useful information or no display at all for maximum speed. Since Tkinter requires initializing a window before it can do anything I decided to break the main loop into two parts. If I choose to use the graphical display then I use the after method of updating. If I choose one of the other display options then I use have to do my own looping with a while loop.


Leave a Reply
You must be logged in to post a comment.